
0 How to do a Tent Stitch?
- by Ute
- 30-07-2025
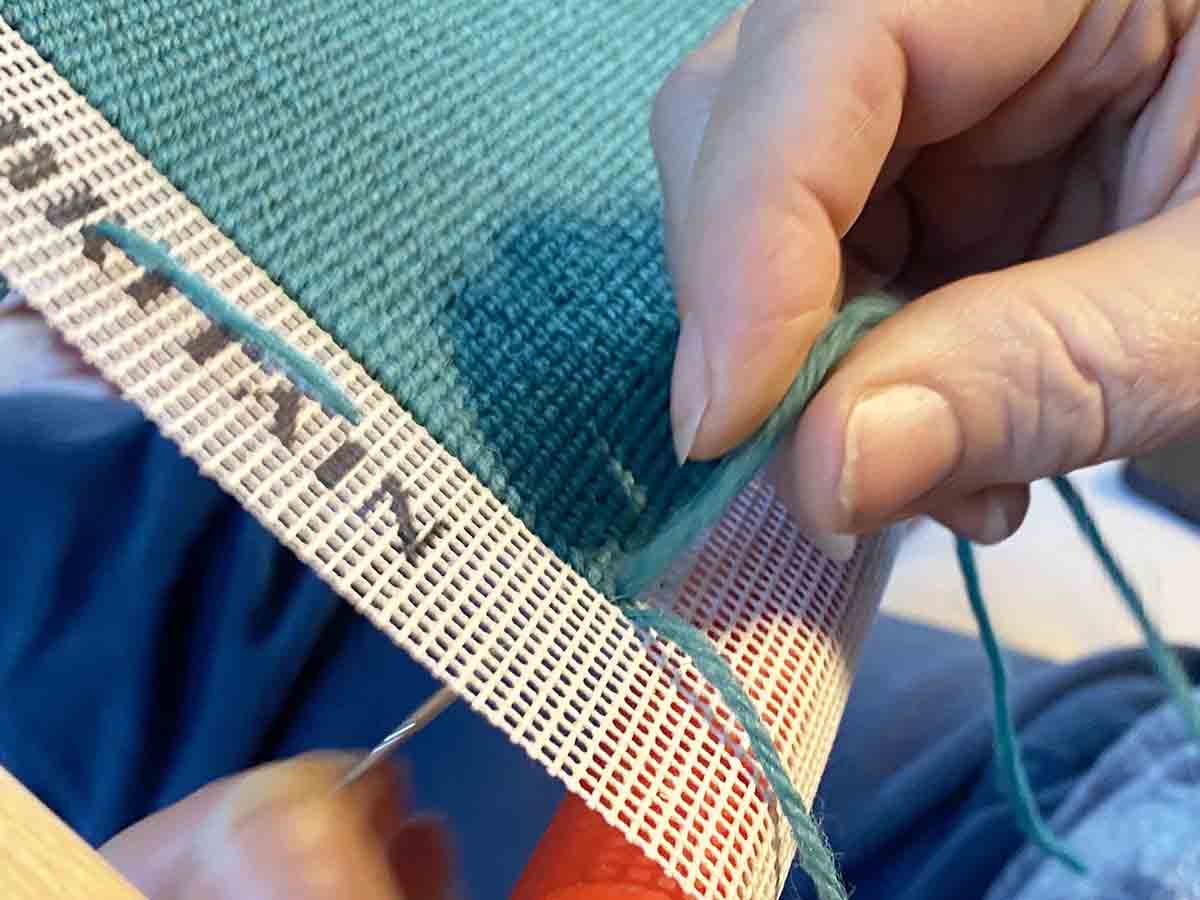
How to do a tent stitch? Our guide
What is a tent stitch?
Tent stitch is one of the fundamental stitches in needlepoint! When you are working on an open tapestry canvas, your stitch will cover one cross intersection of the canvas, travelling from the bottom left corner to the top right corner. This stitch covers the canvas really well, making it better than just a straight stitch. That is why it is so widely used!
Three ways to do a tent stitch
There are three different ways to make a tent stitch, and the main difference you will see is on the back of the canvas. Let’s check them out!
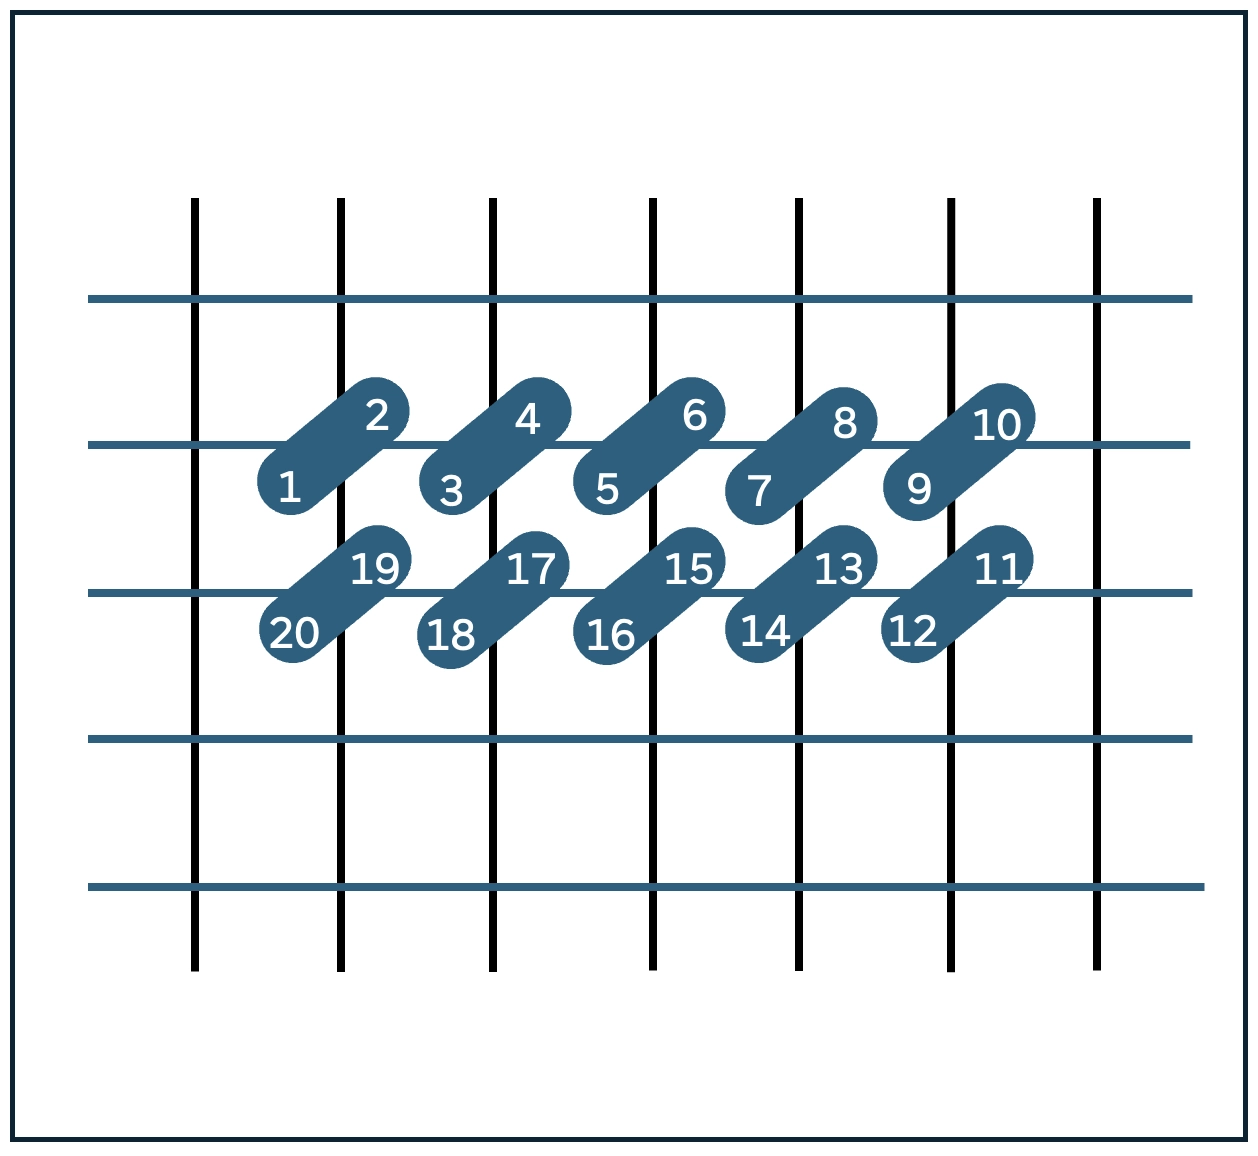
1. Half cross stitch
For the half cross stitch, stitching from left to right across the canvas, you start (from the back to the front of the canvas) bottom left of the stitch across the intersection to the right, then going into the canvas top left of the stitch. Then, on the back, you come out right under the top right stitch you just made. After that, you keep going from bottom left to top right, moving horizontally from left to right. This makes a tent stitch on the front and a straight stitch on the back. See diagram.
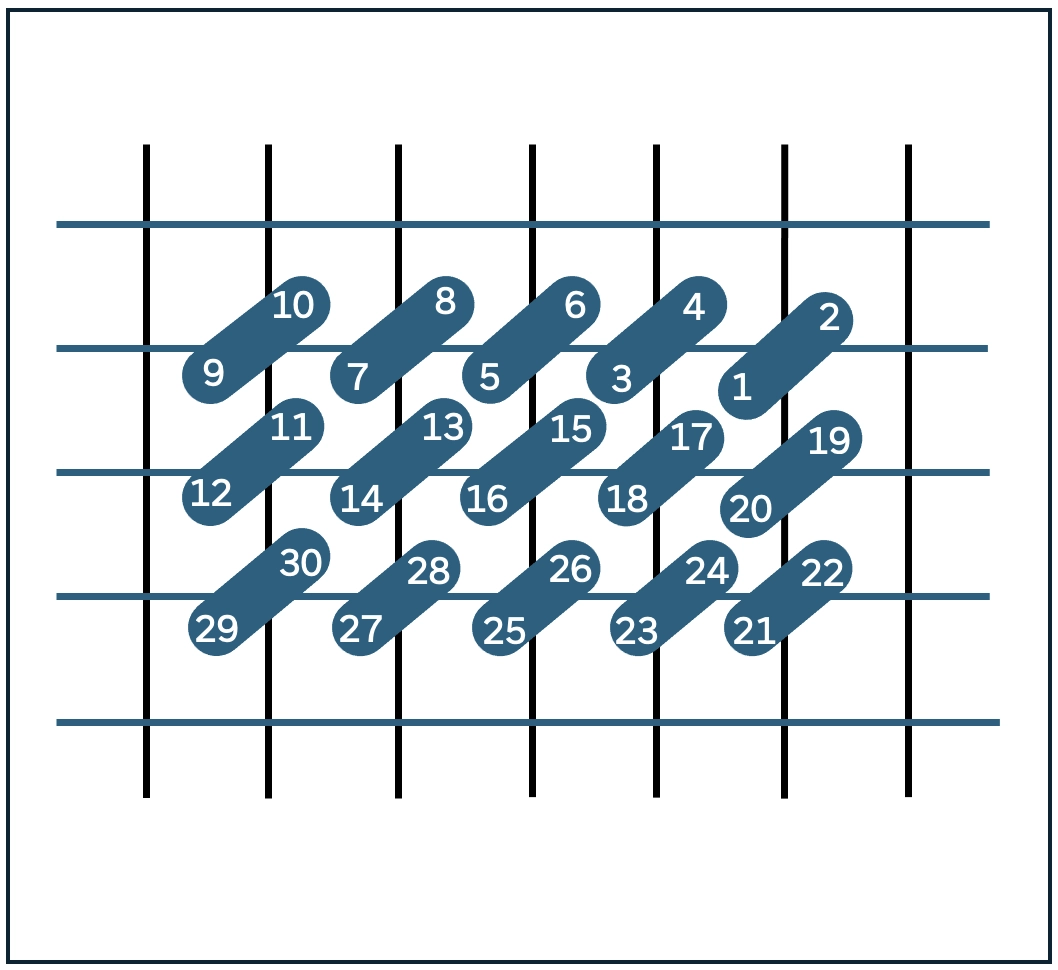
2. Continental stitch
Next up is the continental stitch, stitching from right to left across the canvas. You start by coming out (from the back) to the front at the bottom left going in (from the front) at top right of the stitch. Then, you come out to the left of the first stitch and cross over to the right and so on. This creates a tent stitch on the front and on the back; your wool crosses over the warp (canvas upright). See diagram.
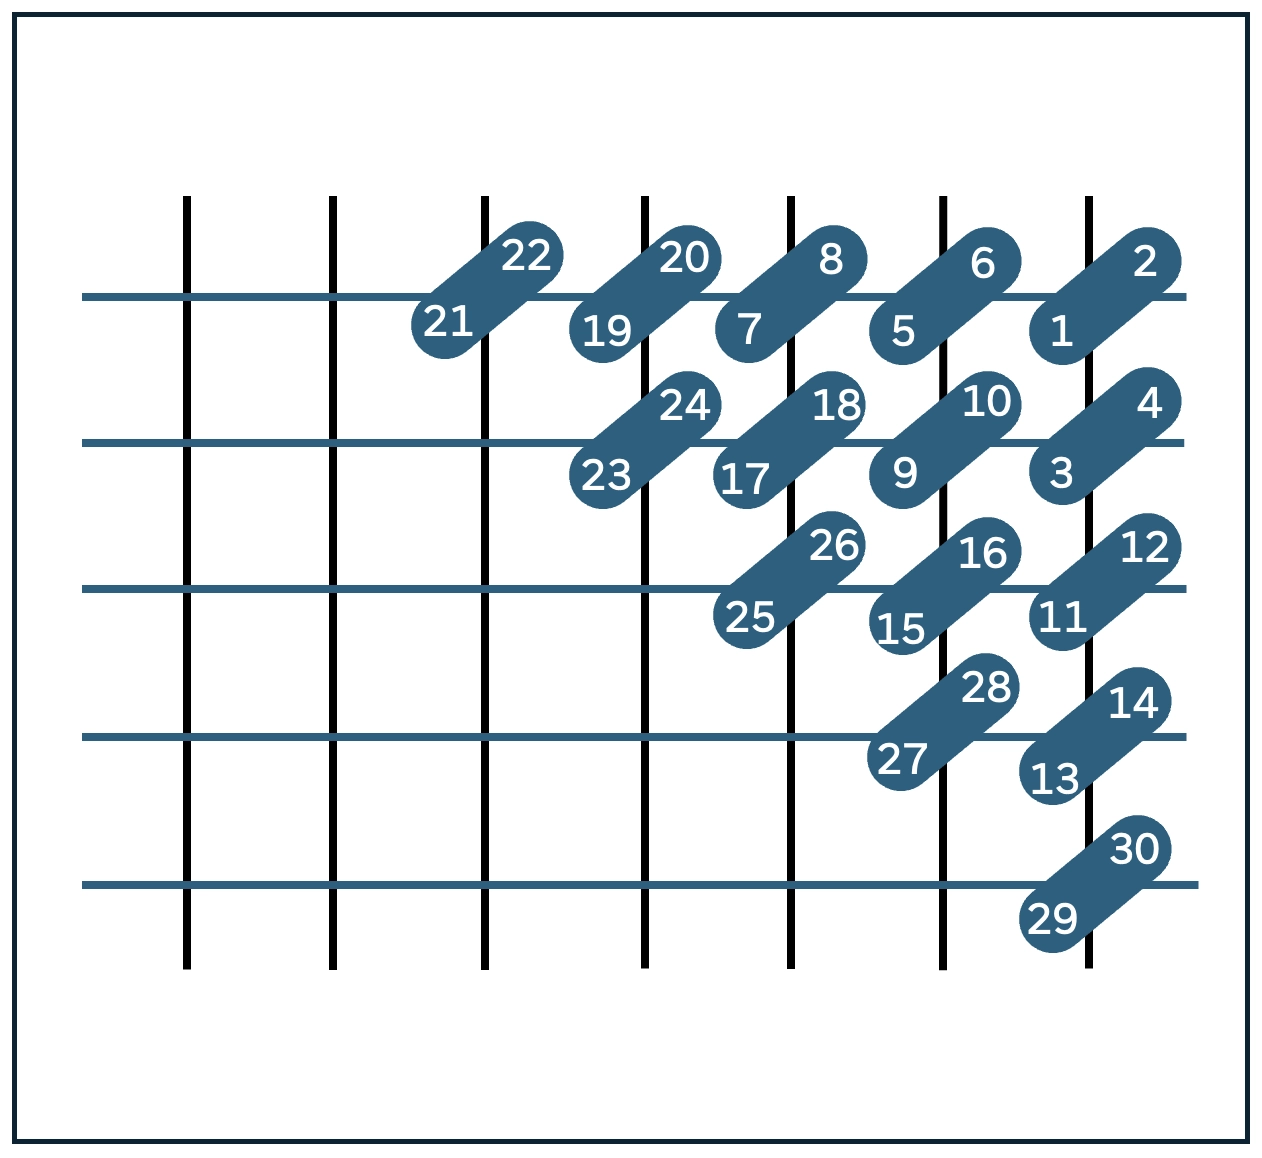
3. Basket weave
The basket weave is a bit different, as this is stitched diagonally across the canvas. You start at the right corner of the canvas, coming out to the bottom left and in at the top right. Then, you come out directly below the first stitch and back in directly below it. After that, you come out to the left of the first stitch and in level with the first stitch. You keep going like this to create a woven look on the back! See diagram.
Which stitch should you choose?
Now you might be wondering which stitch is the best to use since they all look pretty similar on the front. Here is what we think:
Half cross stitch:
This one uses the least amount of wool, but it is not as strong. So, if you are making something like a cushion or a glasses case, a piece which will be handled, it might not wear as well. If you look on the back you will find that the warp threads of the canvas are not covered. However, it does not distort the canvas as much as the continental stitch.
Continental stitch:
This stitch is solid and gives great coverage! But it can distort the canvas a bit. You can reduce this by using a frame, and once you finished, you can block it to get it back into shape. Good for working horizontally and in sections.
Basket weave:
This stitch goes up and down diagonally and creates a cool woven effect on the back. It has the least distortion, making it perfect for projects that will get a lot of use or for big areas with a single colour, but is also suitable for working in sections.
Now you’re ready to try out the tent stitch and have fun with your needlepoint projects! Happy stitching!